
Simple and effective process for vocals
BLOG
We live We love

Simple and effective process for vocals
Even in our technologically advanced age, one of the most common challenges in music production remains the meticulous processing and mixing of vocals.
Below, we'll outline a simple yet effective process for vocals processing. However, it's crucial to remember that achieving a high-quality result requires starting with high-quality material. We recommend recording vocals at around -18 dB, with the understanding that louder parts like screams should not exceed -10 dB. Once we have a raw vocal recording, we can begin the mixing process.
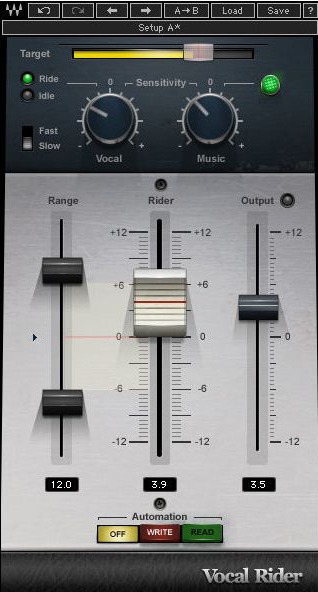
Step 1: Gate and Auto Gain
Raw recordings often contain unwanted noise like room tone, mouth clicks, and other artifacts. Use manual techniques or VST plugins to eliminate these unwanted sounds. This requires patience and attention to detail, as these noises can significantly detract from the final mix. Once the vocal is cleaned up, use a tool like Waves Vocal Rider to ensure a consistent overall level.
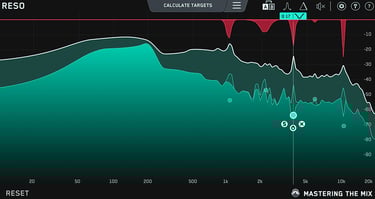
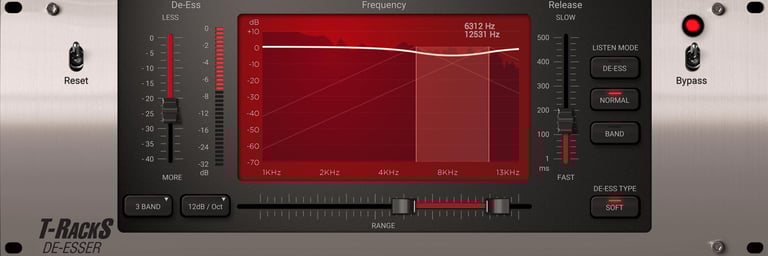
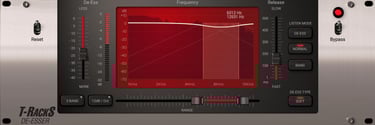
Step 2: EQ, Resonance, and De-Esser
Generally, everything below 100 Hz in a vocal recording is unnecessary. Since this frequency range is dominated by other elements like kick, bass, and sub, we'll remove these unnecessary low frequencies based on the vocalist's tone. This will also help eliminate „p“ „b“ sounds, which can be distracting and unnecessary.
After removing unnecessary low frequencies, focus on the high-frequency range. There are many de-essing techniques to reduce or eliminate excessive sibilance from sounds like "s" and "sh". This information is typically found in the 5 kHz to 9 kHz range. Multi-band compressors or dedicated de-essers (like Waves Sibilance or T-Racks De-Esser) can effectively address this issue.
Additionally, use EQ to eliminate unwanted resonances in the vocal recording. Do this carefully, as improper EQ can damage the signal.Tip: We recommend the RESO plugin for this task.

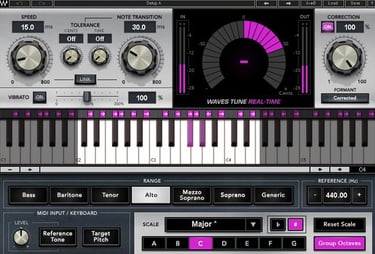
Congratulations, your vocal is already sounding pretty good. However, sometimes even the best vocalists may not hit the correct pitch. That's why there are various pitch correction effects available to music producers. We recommend performing pitch correction after the vocal has been cleaned up and prepared for mixing.
There are many resources available online to help you learn how to perform high-quality pitch correction and choose the right method for you. You can use automated effects like Auto-Tune or manually correct specific areas of the vocal.
That's it for now. Stay tuned for the second part of this article.
Step 3: Pitch Correction


NEC RECORDS ©2025®